
Setting up your Environment
Programs you will need
- A linux, mac or Windows machine
- Virtualization software (VMware, Virtualbox)
- Kali Linux, Parrot Security or your favorite security linux distro
I have all 3 operating systems on different machines, but I’ll be using my linux machine for these articles. I will also be using Virtualbox and Kali Linux for my virtual set up. It is alright if you use other programs, but all screenshots will be of Kali Linux and Virtualbox.
Setting up Virtualbox
First thing you’ll need to do is set up your virtualized environment.
What is virtualization? Essentially, this is way to emulate other operating systems on your computer without having to buy specific hardware tied to that operating system. Long gone are the days where you’d have to buy another computer with an operating system pre-installed in order to see how it works. Now you can use your existing computer’s resources and create a virtualized environment of pretty much any opertating system you can think of.
If you go to the Virtual Box downloads page, you will be presented with this page:
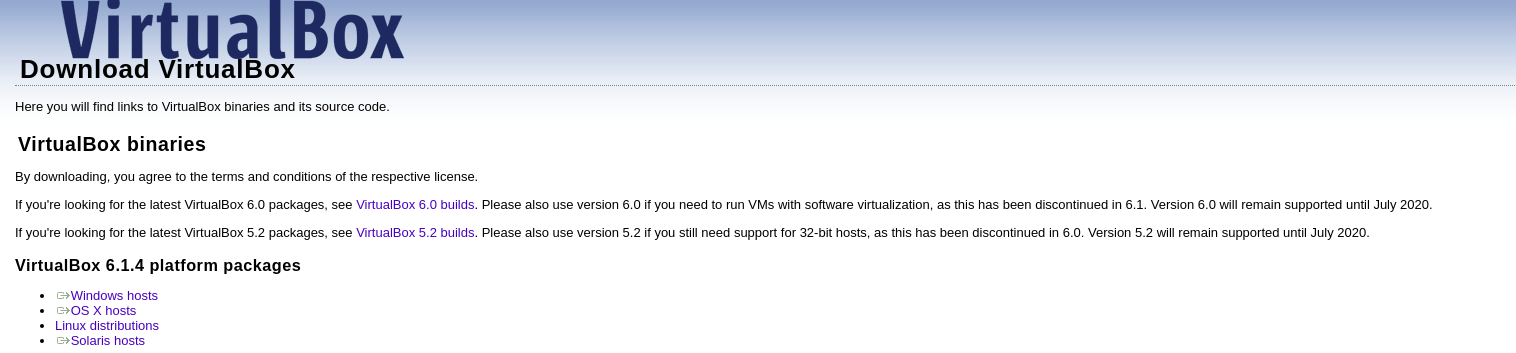
Download the appropriate version for your computer and follow the instructions to complete the installation. You may also be prompted to download the extensions pack, which you should do. Once everything is installed, you should be looking at a GUI like this:
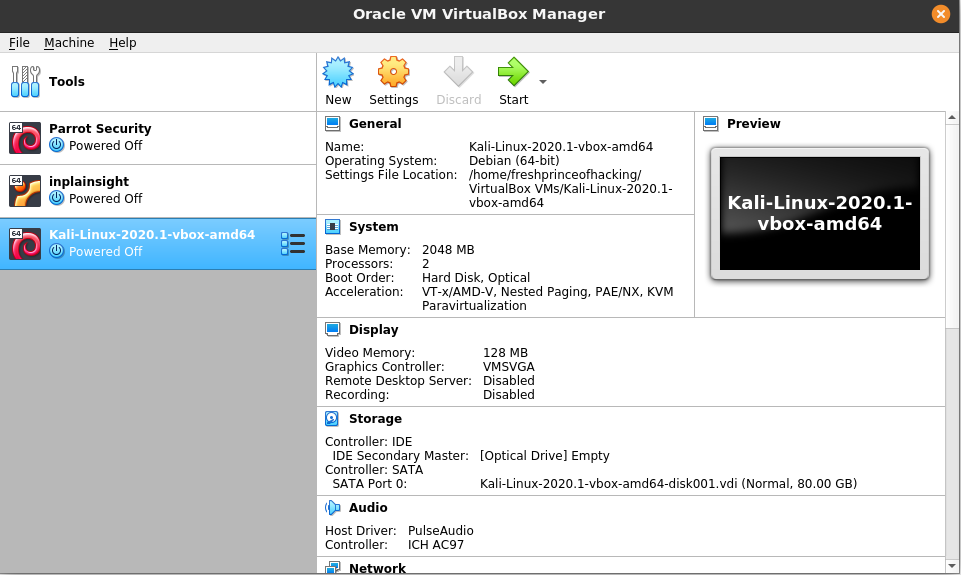
As you can see I already have kali and parrot set up, as well as a practice vm.
Setting up Kali Linux
Now we’ll need to downlaod our security pentesting platform.
What is Kali Linux? Kali Linux is an all purpose pentesting linux distribution created by Offensive Security. It comes pre-packaged with hundreds of tools that pentesters use in real life engagements. This makes this distro very powerful and it can definitely be used maliciously or stupidly, depending on the user. If you want to get your feet wet with linux, I reccommend starting with a distro like Ubuntu. You will need to know basic linux commands to be able to properly set up/maintain the distribution, as well as use the various tools.
You have a couple of different ways to install Kali linux, but the easiest way is to download the virtual box file and import it into your virtual box program. You can get to the downloads page for virtual box here. I downloaded the 64 bit program because I’m running 64 bit on my operating system, which most up to date systems should be running.
Once you’ve downloaded Kali, open up virtual box and click on File -> Import Appliance. Click on the file icon and find where you downloaded the kali image. You will end up at a screen like this:
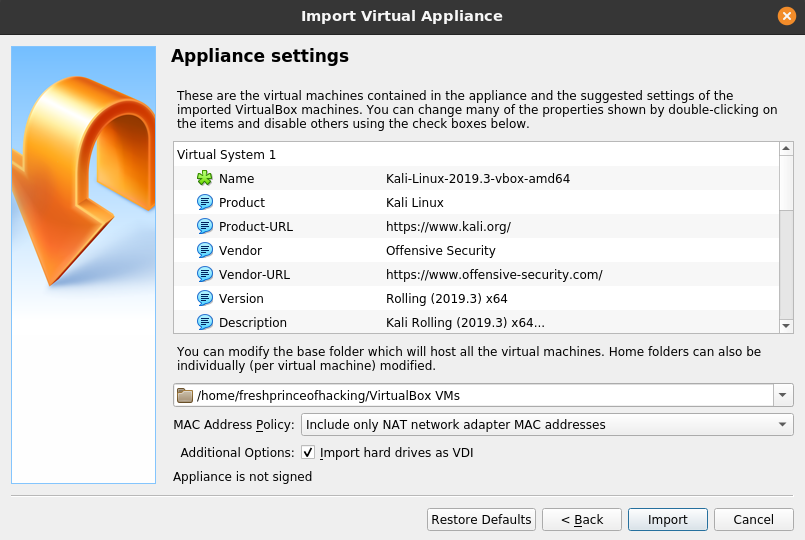
Leave all of the default options on and click “import.”
After finishing, you should be able to see your imported machine. Run the machine to make sure it turns on and you can get to the home page. By default, the username and password is kali/kali (you can change this. you should change this. please change this). This is different than previous versions where the username and password were root/toor. You no longer have root privileges on the newest versions of Kali.
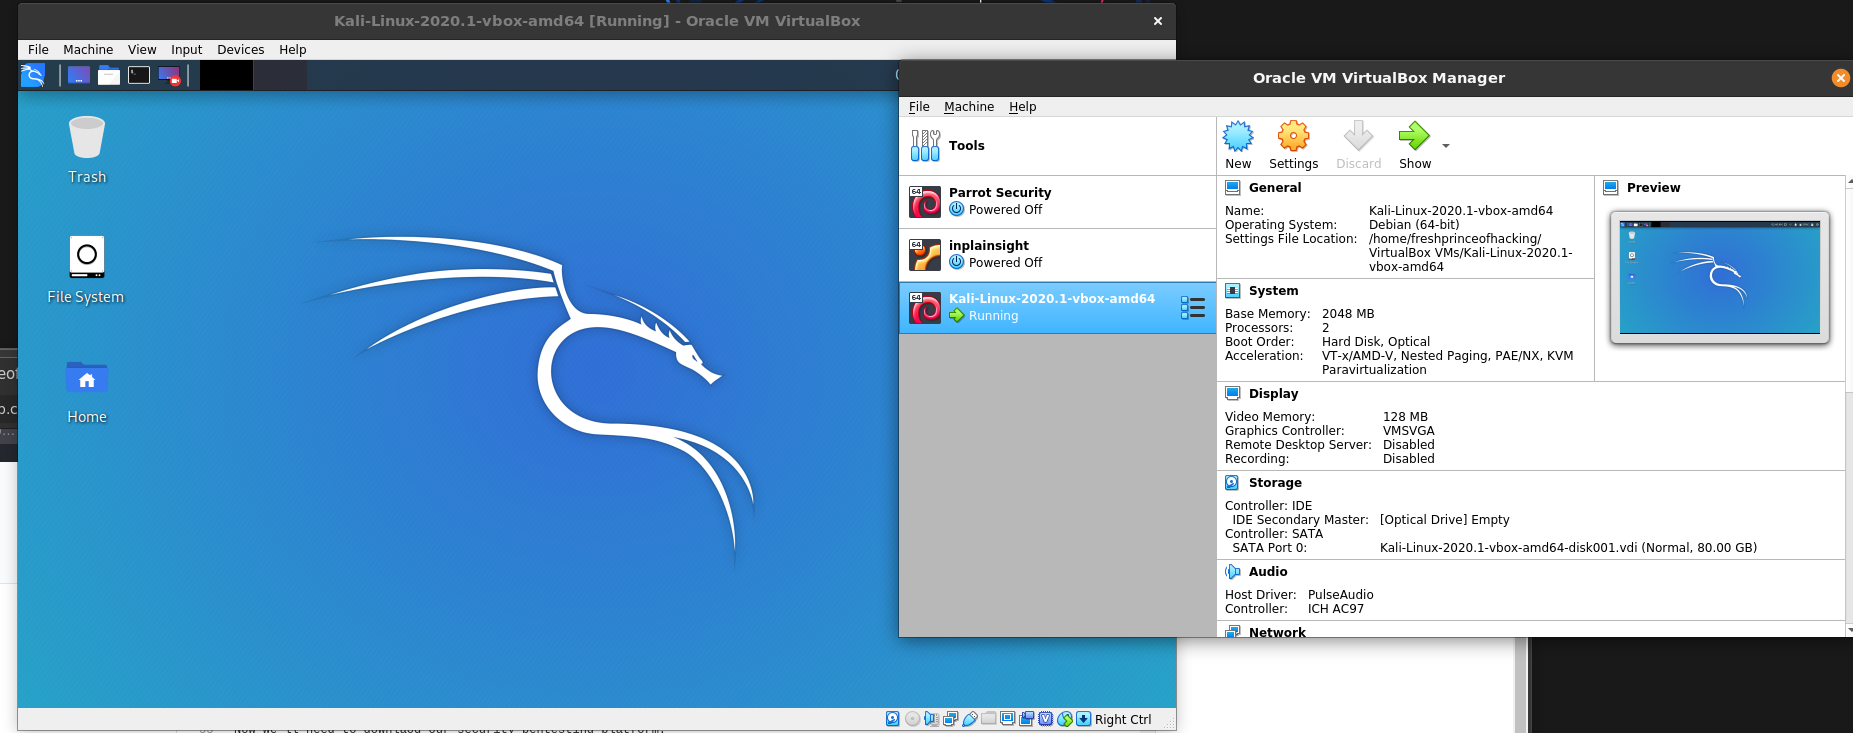
Yay! Kali is installed, but we’re still not done….
Networking mode
This step is probably one of the most overlooked and consequently most frustrating down the line when you actually start downloading vm’s. We need to now make sure that our kali vm and any vm we downlaod are able to communicate with each other. The power of virutalization is not just the fact that we can emulate other operating systems, but we can also create entirely new simple or complex networks filled with many different virual machines. Luckliy for us, we’re only going to need 1-3 machines running at the same time, so that isn’t too hard to manage.
*shut down your kali vm before you do this
First, go to your “settings” tab of the kali vm. From the new menu, click on the “network” sidebar tab. You should have a screen similar to this:
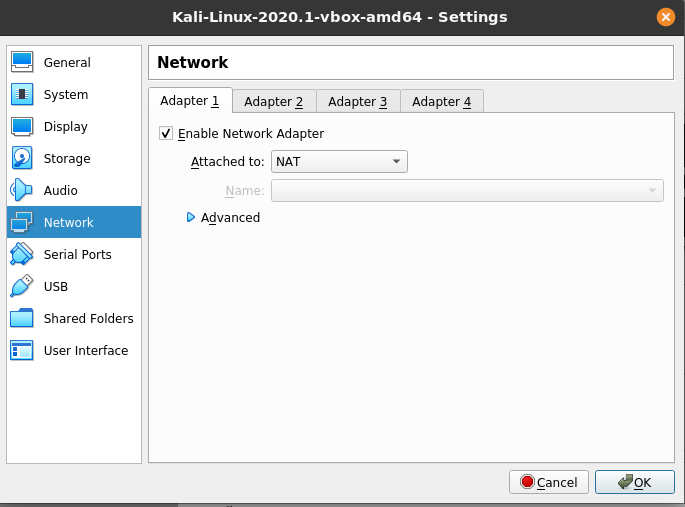
Where you see “Attached to:” is the place you’re going to click on and a drop-down menu will appear. There are a lot of options, all which have their own purpose. If you know networking to a decent extent, you should recognize or at least understand each networking type. For our purposes, we’re going to want A) connectivity to the internet for our vm, and B) connectivity to each additional vm we have running. This is most easily done by choosing “bridged mode.”
TL;DR: Bridged mode will make it look like our virtual machine is a seperate device on the network, while being able to connect to the outside internet that our host machine (the computer running the virtual software) is using. Pretty neat, huh? As a separate device on our network, we can communicate with whoever else is on the network, including other guest vm’s with the same network setting. MISSION ACCOMPLISHED!
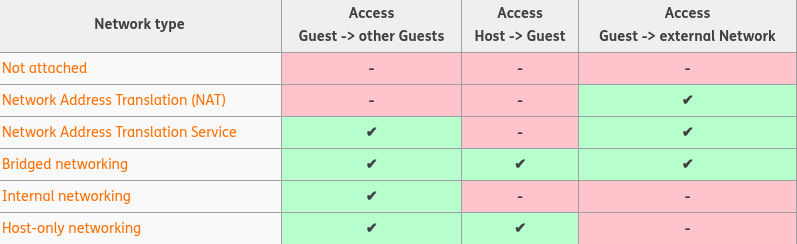
*If you’re curious, here’s a picture of the different networking modes and what’s posisble
In the next post we’re going to look at the various tools you’ll be using in kali to hack!